In this tutorial, you will learn how to submit Webflow forms to your own backend.
Our strategy will be to intercept the HTML form submission event, prevent it, serialize the form's data to JSON, and then forward that to our backend using AJAX. I have chosen this approach for the following reasons:
- AJAX: easier to dynamically implement error and loading states, compared to HTML form submissions.
- JSON: a friendlier beast to work with, compared to FormData.
In this tutorial I'll be using a Formspark API endpoint, but the steps should work with any API supporting JSON.
Setting up the form
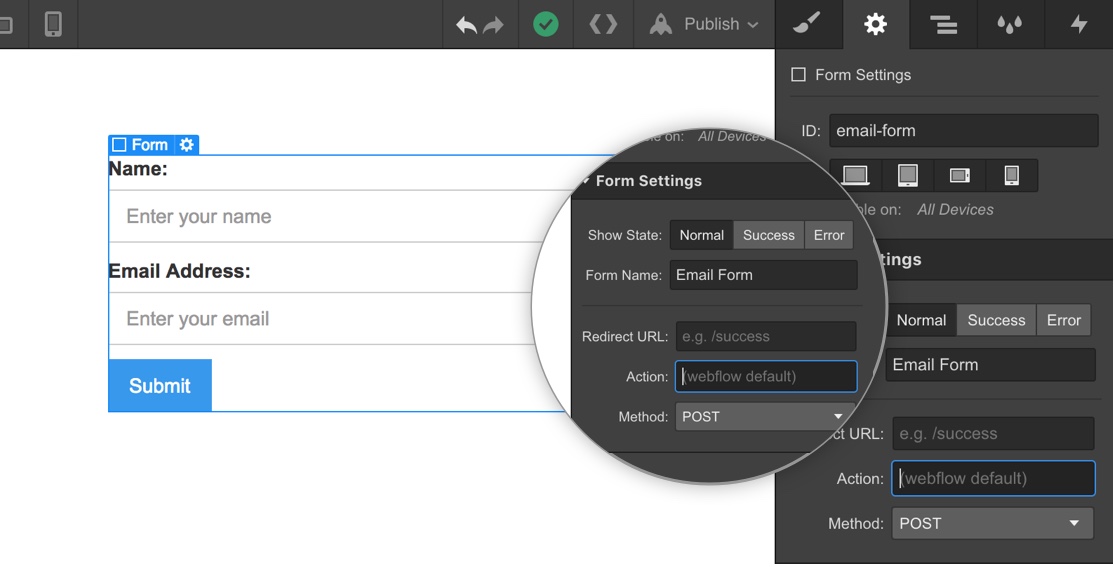
To start, create your form in Webflow and paste the URL of your backend endpoint into Webflow's action field.

In the next steps, we will be interacting with the HTML code Webflow generates for its forms, which looks approximately like this (abridged):
<!DOCTYPE html>
<html lang="en">
  <head>
    <script
      src="https://code.jquery.com/jquery-3.6.0.js"
      integrity="sha256-H+K7U5CnXl1h5ywQfKtSj8PCmoN9aaq30gDh27Xc0jk="
      crossorigin="anonymous"
    ></script>
    <style>
      .w-form-done {
        display: none;
      }
      .w-form-fail {
        display: none;
      }
    </style>
  </head>
  <body>
    <!-- Your endpoint should appear here 👇 -->
    <form action="https://submit-form.com/technotrampoline">
      <input type="text" name="name" />
      <input type="email" name="email" />
      <input type="submit" value="Submit" />
    </form>
    <div class="w-form-done">Form submission succeeded</div>
    <div class="w-form-fail">Form submission failed</div>
  </body>
</html>
Intercepting submissions
Next, we want to prevent Webflow's default behavior, which is to send the form using an HTML form submission.
Copy-paste the following code into Project Settings > Custom Code > Footer Code:
$('form[action="https://submit-form.com/technotrampoline"]').each(function (
  i,
  el
) {
  var form = $(el);
  form.submit(function (e) {
    e.preventDefault();
    // ...
  });
});
Note: we are using jQuery because Webflow includes it by default, and its usage has been widely adopted by the Webflow community.
Serializing to JSON
The snippet below is a utility function to serialize a form's data to JSON:
function convertFormToJSON(form) {
  var array = $(form).serializeArray();
  var json = {};
  $.each(array, function () {
    json[this.name] = this.value || "";
  });
  return json;
}
We can now convert our submission data:
form = $(e.target);
var data = convertFormToJSON(form);
Submitting JSON with AJAX
The following code sends the data via an AJAX POST request:
var data = convertFormToJSON(form);
var action = form.attr("action");
$.ajax({
  url: action,
  method: "POST",
  data: JSON.stringify(data),
  contentType: "application/json",
  dataType: "json",
  success: function () {},
  error: function () {},
});
Success and error feedback
We can toggle certain Webflow-provided elements by styling them in the success and error handlers of our AJAX function:
$.ajax({
  // ...
  success: function () {
    var parent = $(form.parent());
    // Hide the form
    parent.children("form").css("display", "none");
    // Display the "Done" block
    parent.children(".w-form-done").css("display", "block");
  },
  error: function () {
    var parent = $(form.parent());
    // Display the "Failed" block
    parent.find(".w-form-fail").css("display", "block");
  },
});
Final code
<script type="text/javascript">
  function convertFormToJSON(form) {
    var array = $(form).serializeArray();
    var json = {};
    $.each(array, function () {
      json[this.name] = this.value || "";
    });
    return json;
  }

  $('form[action="https://submit-form.com/technotrampoline"]').each(function (
    i,
    el
  ) {
    var form = $(el);
    form.submit(function (e) {
      e.preventDefault();
      form = $(e.target);
      var data = convertFormToJSON(form);
      var action = form.attr("action");
      $.ajax({
        url: action,
        method: "POST",
        data: JSON.stringify(data),
        contentType: "application/json",
        dataType: "json",
        success: function () {
          var parent = $(form.parent());
          // Hide the form
          parent.children("form").css("display", "none");
          // Display the "Done" block
          parent.children(".w-form-done").css("display", "block");
        },
        error: function () {
          var parent = $(form.parent());
          // Display the "Failed" block
          parent.find(".w-form-fail").css("display", "block");
        },
      });
    });
  });
</script>
